|
| |||||||||||||||||||||
|
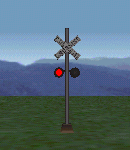
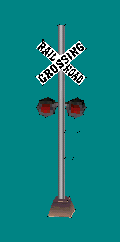
(Animated Textures) Two definitions. An animated bin - is a model that moves. For example, the dinosaur in crazy 98, the oil pump in sidewinder canyon, Alpine's helicopter and windmill, and all of Toxin's loaders. Each of these models is composed of several bins, each one slightly different from the others so that in the game it creates motion. A bin with animated textures - is a model that has a moving part. For example, Guitar Bill's txflames, globe and vulture, Anarchy's spooky trees, and Rooski's warning sign. Each of these models uses only a single bin, but each one uses many textures to create their effect. This page will deal with bins using animated textures. Making animated textures on a model involves some planning ahead. First, you must know what the model will be. Then, you must make it. It should be obvious that you cannot create an animation on an unfinished model. You must also plan where the animation will go (eg. on the whole side of a model, or on a small part only) and make the faces where you plan to apply the animation. The model must be complete and fully mapped (except for the animation). And, it must be saved on the hard drive. For our example, I will create flashing lights on a railroad crossing sign. Let's look at the finished model now so you can see what we're aiming to do.
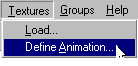
Step 1 - Defining the Animation When your "un-animated" model is made, saved and ready to go, clear the working area and then goto Textures>Define Animation on the menu:
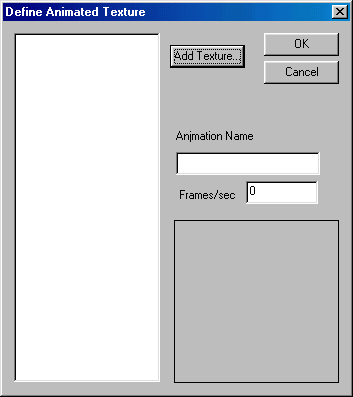
Click "Add Texture" and browse to the textures you want to include in the animation.
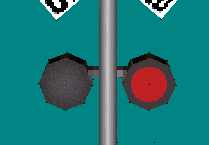
For our example, I made two textures. One with the light on, and one with the light off.
The animation will switch back and forth between these two textures to create the impression of a blinking light - on one moment and off the next.
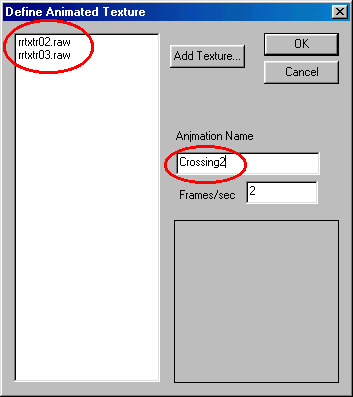
Once the textures are loaded, they will appear in the column on the left. Now, you must give the animation a name. You will use this later when you map the animation to the model. Any name will work but, like naming groups, you should keep it simple and make it appropriate to what you are doing. No spaces. For our example, I will define two animations and name them Crossing and Crossing2.
Next, you must indicate a frame rate. This controls how fast or how slow the animation will appear on your model. Binedit measures the frame rate in frames per second. The rate you choose will depend on the effect you want to create. You may have to experiment to get it right. For our example, I will use 2 frames per second (I want to create a medium paced blink that goes left right left right on either side of the crossing post). The completed animated texture box(es) will look like this:
Notice that for each animation I have defined, the textures are loaded opposite one another. In the first animation I use 03 - 02, and in the second I use 02 - 03. One animation will start with the light off, the other with the light on. This is important to get the back and forth effect. Using one animation or using the same texture order for both would result in the lights blinking on and off at the same time. You can see the name and frame rates filled in as well. Click OK, and the animation is defined.
Step 2 - Mapping the Animation to the Model This is done exactly the same as you would map a face or group of faces to a texture, except this time you'll be mapping it to the animation. Now that you have the animation defined, goto Files>Open and load the model you want to animate with textures. Here is our railroad crossing sign:
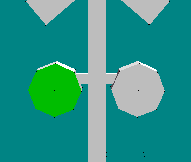
Use the space bar to cycle through the faces, and when a face you want is highlighted (purple) use the F key to select it (green). Continue until the area is selected that you want to animate. For example, like this:
Now goto Groups>Map Face Group to Texture. In the Face Group Texture box, the animation(s) you defined will be available as an option. Select it from the drop down, like this:
Click OK. Now, repeat for each animation you want to define and map. In our example, that means doing the other side. When you're done, the model should look something like this:
Save your work. You are ready to road test the model in a track. If you want to get fancy with this model, in Traxx object properties set Continuous Sound to Cross5 - Railroad bell. Now you have a railroad crossing sign with blinking lights and a ringing bell. Mouse over the pic for a preview.
|