|
| ||||||||||||||||||||||||||
|
(Custom Textures)
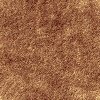
Making ground textures is not too hard at all. First make two (you could do more) basic 64x64 textures that you want to use as the road and off-road areas of the track. I used Sausage Software's Reptile program to generate the textures (You could also make them in psp using the various spray features). For example, you might want grass and dirt.
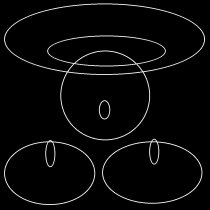
Save your work after every major step! Next, you need a course layout. You can sketch or doodle your layout on paper or work right from your imagination. For the present case, I will use this sketch so that you can see the development of the track unfold from beginning to end.
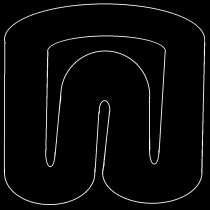
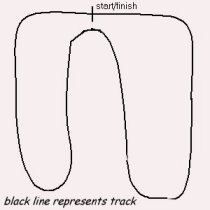 Using PSP, create a black and white 964x964 graphic layout that you want to use as the basis for your track. Of course, you might use other colors too, but the point is they should be as different as possible. Road outlines (corners & straights) are drawn using the line and shape tools.
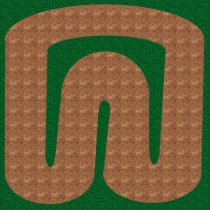
Now you have the finished outline for your track. Compare it to the original sketch. Use the fill tool with the patterns option to color in the different areas of your outline. Remember, you must have the track outline AND the textures loaded into psp.
Note : you will have to fill the lines of your diagram separately from the track areas. In pattern options, set tolerance to about 25 to make an easy job of it.
Still using PSP, reduce the colors to 256. You are almost done. Save your work after every major step!
Lastly, copy the finished image and paste it directly into Traxx using the paste texture feature.  Act & Raw files are created automatically and you get seamless results. Careful, though, Traxx only allows you to use 512 textures. That's only a small area (approx 22x23 grid squares); that should be plenty for an arena but there are a couple things you should be aware of. Traxx will only hold the maximum number of textures, and the templates already use over half of them. To get around this problem, delete the texture layout in the top right corner of the template (that is one of Sir James' template features that I stuck to). Just copy a 10x10 area of the base texture and paste it over the layout section until it is gone. Also, repeat this step for the interior of the arena area at 128x128 in the grid space. Careful. Leave the outer edges alone so you can still see the outline of the arena area. Now go to the texture dialog box and sweep clean all the unused textures. You should have only about 50 or so left loaded; plenty of room now. Traxx only allows you to paste a 16x16 section but the arena2.bin is 18x18. No problem. Before you do anything, you can paste in your base texture and use it to trace the outer edge of the arena area. Now, when you do the clean sweep, you can reduce the number of textures loaded into Traxx down to 2. The remaining space in the arena area is 16x16, perfect for a one-shot paste-in job.  Your custom track image should be 964x964 pixels. Any less and you will only get a 15x15 (or smaller) grid square paste. Any larger and you risk cutting off the edges of your track image. The outer buffer trick is also good because it will force the track to stay inside the arena - without the buffer, adjusting altitude and curves and such may cause the track to butt up against the walls, which doesn't make for a good looking or good running track. Once you have the track image pasted in, you need to paint the arena terrain one square at a time. No need to groan, though, because Traxx creates a naming system that's orderly. Facing North, start at top left and paint in sequence in a left to right direction, when you get to the end of the row, just start back at the left of the next row. Continue until you're finished No hassles, really.
|