|
| ||||||||||||||||||||||||||
|
(Arranging) This section might better be titled, "Placing and moving textures all around the terrain so that your track actually looks like a track," but it wouldn't fit on the menu so I settled for "Arranging." Also, the Guild highly recommends that you follow the lessons outlined in Traxx School which provides detailed coverage on this topic (among others) within its own context. If you have not done Traxx School, then I would suggest you might want to do that now since I have no wish of trying to re-write or improve upon Traxx School or otherwise belabor a point unnecessarily. Instead, this page, for the sake of reference, will briefly review the basics of applying textures to the terrain, and then move on to a few definitive issues. Assuming that you have loaded all the textures that you want to use, you may close the right side of the textures box by clicking the load button.
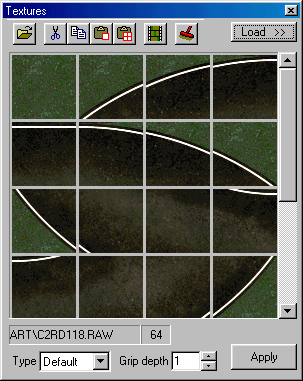
The textures box will now look like this. The textures that are loaded will vary, of course, depending on the stock track out of which you are making your track.
Painting and Applying Textures
There are two ways you can apply textures to the terrain. For
both, you will need to turn on texture edit mode by clicking the - First, you can use the Apply button located at the bottom right hand corner of the texture box. To "apply" textures, click the texture you want to use in the texture box. It will be outlined with a red square. Next, click the location on the terrain that you want to paint. It will be outlined with a magenta square. Now, click the Apply button. Voila, the grid square is painted with the texture you indicated.
- Second, you can use the Paint Mode feature located as part of the
side tool bars. This appears automatically when you click the texture
mode button
To "paint" the terrain, check mark the box beside "Paint Mode" and enter a value of 1 in each of the text boxes.
Next click the texture you want to use in the texture box. Again, it will be outlined with a red square. Now, click the location on the terrain that you want to paint. Voila, the grid square is painted. The Paint mode method is probably a little bit easier to use if you have large areas that you want to paint, but both methods work equally well.
Repeat this process until you have the terrain looking the way you want it. Quoting Guitar Bill, "This process can be a pain, but don't worry - you wont have to do this every time." The Texture Right-Click Pop Up Menu
The right-click pop up menu will save you hours of terrain painting
time. In texture mode
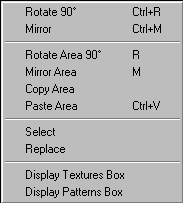
For the purposes of the present discussion, we will concern ourselves with the first six items only. This feature will rotate a single texture ninety degrees in a clockwise direction. You may rotate the texture as many times as you like. So, for example, this Crazy98 dirt road texture:
Will change with these successive rotations:
The rotation feature is a way to conserve the total number of textures used. For example, the average corner in MTM2 uses an area of 5x5 or 25 textures. For four corners, that would be a total of 100 textures. However, if you use the rotation feature, you could load just 25 textures and then rotate them for all your corners. The rotation method will have freed up room for 75 additional textures. Mirror. This is very similar to rotate but instead of spinning the texture, it reflects it as if in a mirror. So, for example, the same texture used above will look like this:
Note: this is not the same as rotating ninety degrees. The texture appears upside down, but has not been reversed. Use this feature to create varied effects in your track. Rotate Area 90 degrees. This feature works exactly the same as the plain "Rotate 90 degrees" feature, except that the rotation can affect a much larger area. Instead of being limited to a single texture, you can rotate an area up to 16x16 grid squares. This is another time saving feature that will help make short work of painting the terrain. Mirror Area. This feature too works exactly the same as the plain "Mirror" feature. Just as with Rotate Area, Mirror Area can affect an area up to 16x16 grid squares. Copy Area. This feature allows you to copy texture sections from one area of your track to be pasted into another. The copied area is NOT stored in the windows clipboard. Paste Area. Used with the copy feature, this will paste texture areas to different locations in the terrain.
|


