|
| ||||
|
(Altitude & Texture Editor) There are two layers to our world: the "Ground layer" and the "Ground Box layer." The Ground layer is the normal terrain that you drive over and the Ground Box layer is used for special terrain such as bridges, tunnels, or buildings. To work with the ground boxes we again need the Altitude Editor. We will use them to build a wall. From the track editor menu, select "C. Altitude Map Editor" by pressing the C key. You may also use the arrow keys to highlight "C. Altitude Map Editor" and press enter.  You will see your track in the editor window. Press the tab key until you see "Ground Box" in the layer section of the information bar. The cursor will change from a + (plus) sign to a square (like the texture editor). 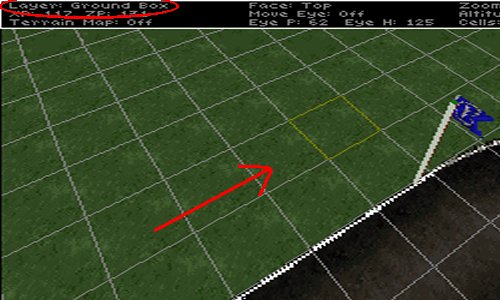 Ground boxes are solid block objects in fixed locations, aligned to the terrain grid squares. Locate the cursor alongside part of the track and press the B key. You will be prompted to enter a top altitude for the box. Type 80 and press enter. You will be prompted for a bottom. Type 1 foot below the terrain surface (see the altitude in the information bar; in our case we'll use 59) and press enter. 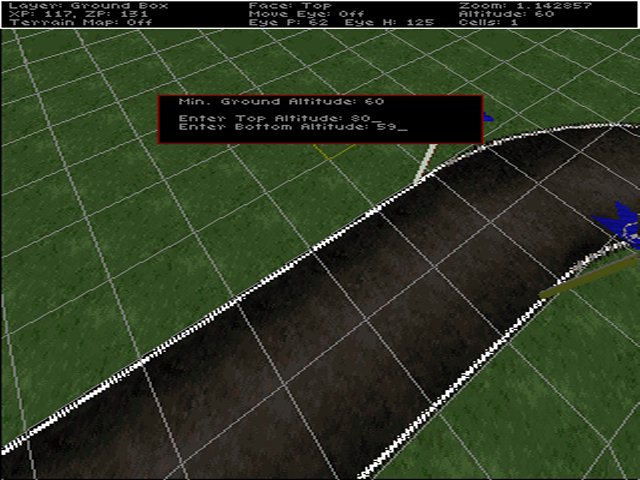 A cuboid will appear. 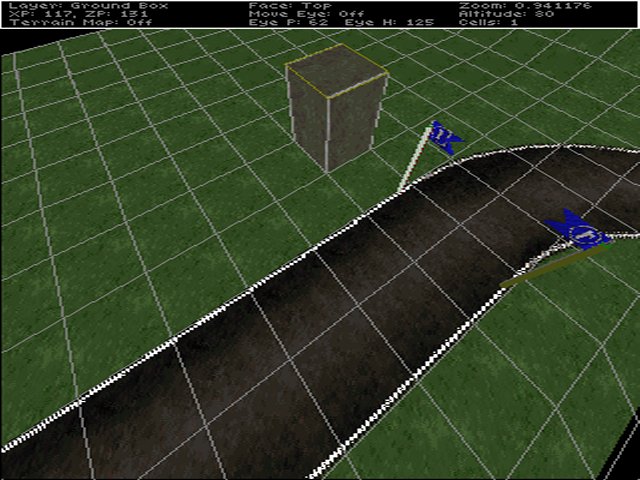 Press the F key to toggle between the top and bottom surface. You can also use the bracket [,] keys to raise and lower ground boxes, just like in terrain editing. Save your work. Paint the groundbox. Textures can be applied to ground boxes just as they can be applied to the terrain. From the track editor menu, select the Texture Map Editor.  Press the T key to open the texture browser, then the G key for the goto texture box. Type "C8BR" to jump to that texture group and select C8BR100.RAW. Back in the texture editor, press the tab key until you're in the Ground Box layer, just as you did in the Altitude editor. Now press the F key to cycle through the faces on the ground box. When the cursor highlights a side, press the space bar to apply the texture. Repeat this for the other three sides. 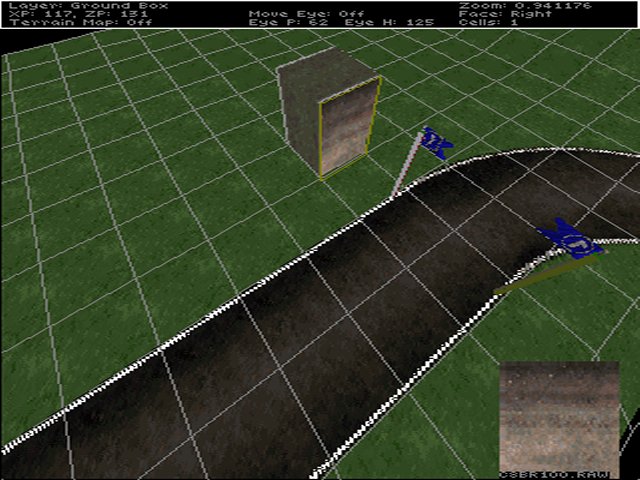 Once again press T to open the texture browser, and G for the goto box. Type "MARK" and select the MARKMTLX.RAW. Now use the F key to cycle through the ground box faces. When the top is highlighted, press the space bar to apply the top texture. Do this again to paint the bottom of the ground box using the MARKMTLX.RAW texture. 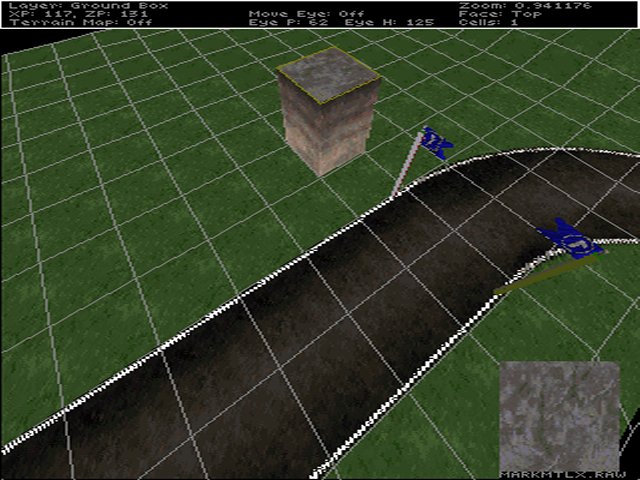 Note. If you want to see the bottom of the ground box, press the E key to rotate the camera eye so that it's below the terrain surface. This may seem pointless, because you'll never see the bottom, but it is necessary for the underside of bridges etc.... so you might as well start good habits now. Save your work. Build a wall. The wall will be made by adding copies of the groundbox we just created. From the track editor menu, goto "C. Altitude Map Editor" once again. Use the tab key to goto ground box layer (if it isn't already). Place the cursor on top of the ground box. Now press F9. Move the cursor so the square next to the ground box is outlined, then press F10. Paste again as many times as you want to build a wall. Unfortunately, the textures are not copied at the same time. But this is no big deal. Just place as many ground boxes as you need, then go back to the texture editor. Select MARKMTLX.RAW from the texture browser and paint the top and bottom of all the boxes. Now do the sides using C8BR100.RAW. Quick and easy. Note. One good consequence of switching between texture and altitude editors is that you save your work often.
|