(Texture Map Editor)
To work with textures (square images that define what the terrain looks like) we need the Texture Map Editor.
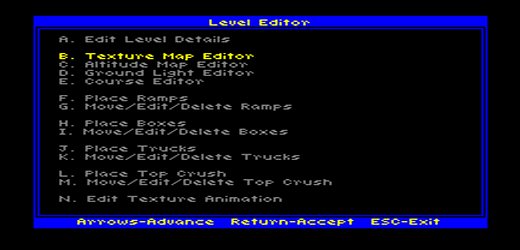
From the track editor menu, select "B. Texture Map Editor" by pressing the B key. You may also use the arrow keys to highlight "B. Texture Map Editor" and press enter.
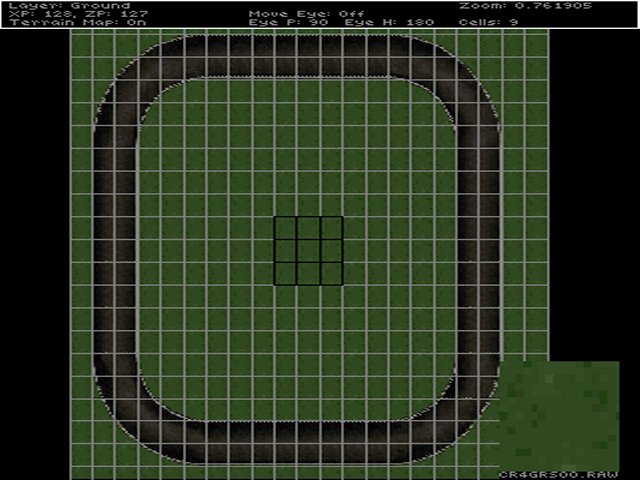
You will see your track in the editor window.
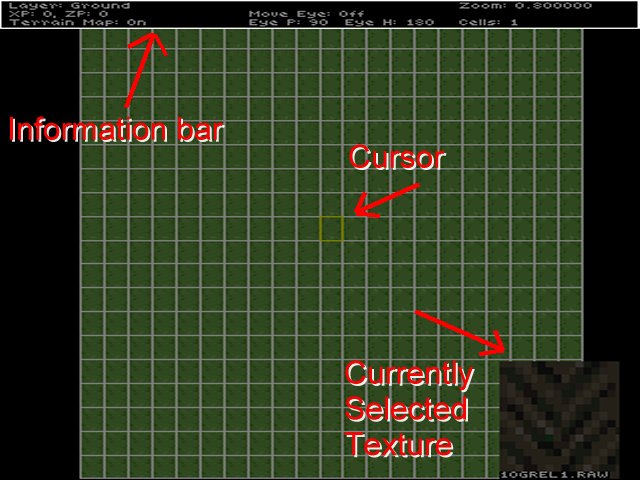
Notice the XP and ZP values in the upper left-hand corner of the information bar. The first time you use Tracked2 these should be (0,0) but may be different the next time you start the editor.

Press the J key for the jump prompt box.
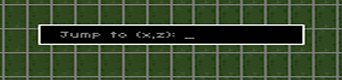
Type "128,128" and press enter.
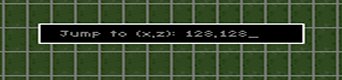
The track area will look just about the same but notice the XP and ZP values.

The mtm2 track world is 256 squares wide and 256 squares high. You should always begin your course in the center of the map. Hence (128,128). Also, knowing the starting point will come in handy later when moving around the terrain.
Next, press M to unlock the view height. Use the +/- keys (at the top of the keyboard, not on the keypad) to zoom in and out to a comfortable height.
Press T to open the texture browser. You should see a bunch of textures that look like bits of mtm2 terrain.

You can use PgUp and PgDn to scroll through all the textures until you see the ones that look like crazy98 roads. Shortcut. Press the G key and type C2RD and press enter. (This will jump or goto the texture whose name matches what you type). You should see a whole bunch of textures with pieces of crazy 98 roads in the texture browser.
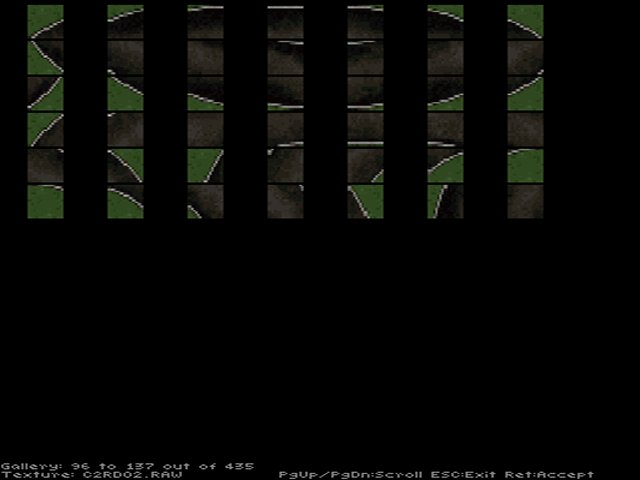
Use the arrow keys to move the cursor to the first texture in the upper left corner. It should be C2RD02.RAW. Press enter to return to the working area. Notice how the currently selected texture has changed to the one you selected.
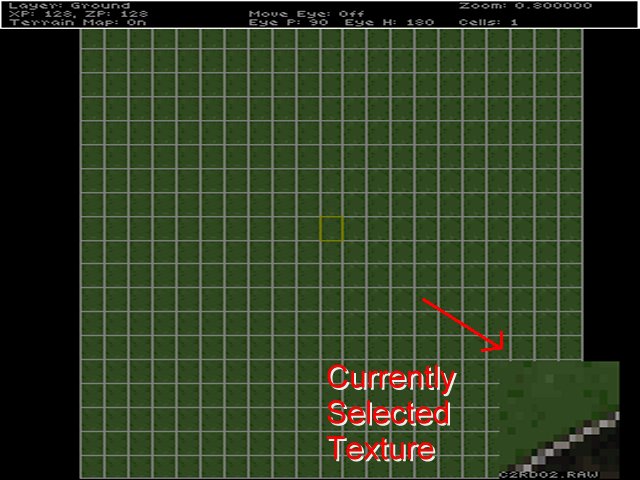
Paint some road. Press the space bar and the current texture will appear in the spot where the cursor is located. Use the arrow keys to move the cursor to the adjacent square to the right of the texture you just painted. You can press T to open the texture browser, use the arrow keys to select the next texture, and press enter to select it. Shortcut. In the main window, use the square brackets [, ] keys to quickly cycle through the textures. In either case, the one we want is called C2RD03.RAW. Once it's selected, press the space bar to paint it next to the first one you put in. Repeat 5 more times and you should see the makings of a road.
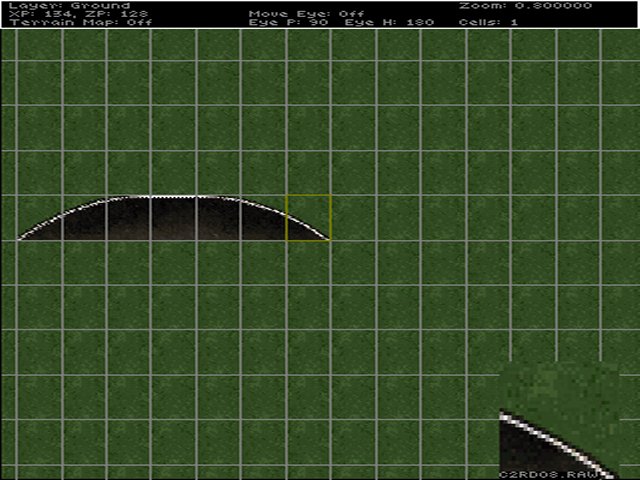
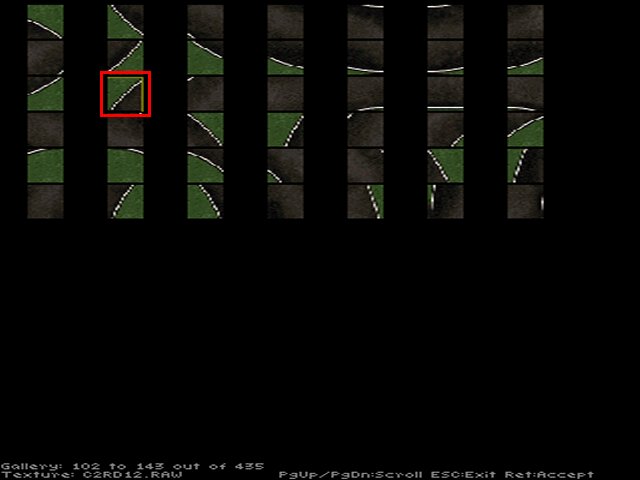
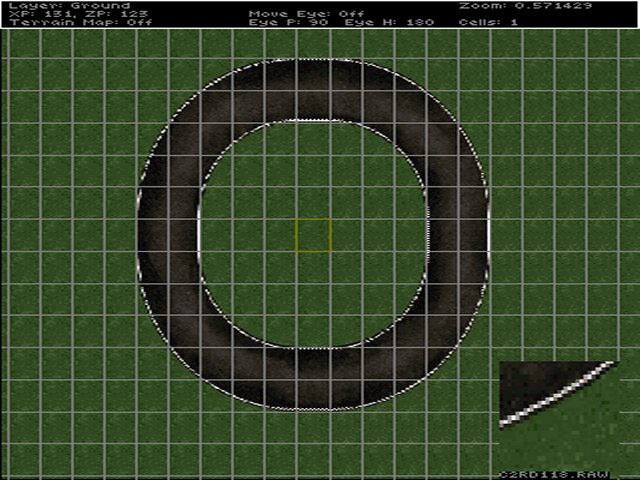
Build an oval. The textures are generally listed in blocks that go together in the Texture Browser, so you can mostly paint them in in strips. However, you will notice the strips might be out of order, so you will need to scroll through the Texture Browser to find the next strip. The second strip begins with texture C2RD12.RAW
There are also some "missing" textures for a full Crazy98 oval - you will need to repeat the straight segments from the left side to the right and also from the top to the bottom to complete the oval.
This process can be a pain, but dont worry - you wont have to do this every time. When you're finished, it should look like this.
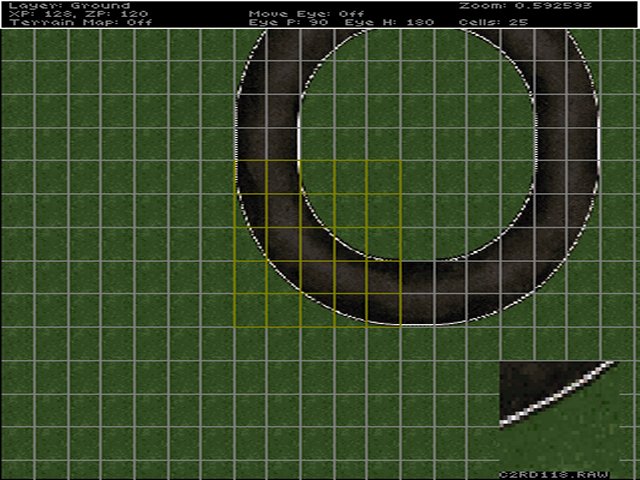
Copy another corner. We will now use the small oval we just built to assemble a larger one. You'll need to use the "-" key (at the top of the keyboard, not on the keypad) to zoom up and away - this will increase the size of the area you can see, which will be helpful for building our larger circuit.
Press the F6 key until the cursor is five squares in both height and width. You can also do height and width separately using F7 and F8. Either will work, but be sure the cursor is 5x5 squares. Locate this box over the bottom left corner of our oval, then press F9 to copy the area to the windows clipboard.
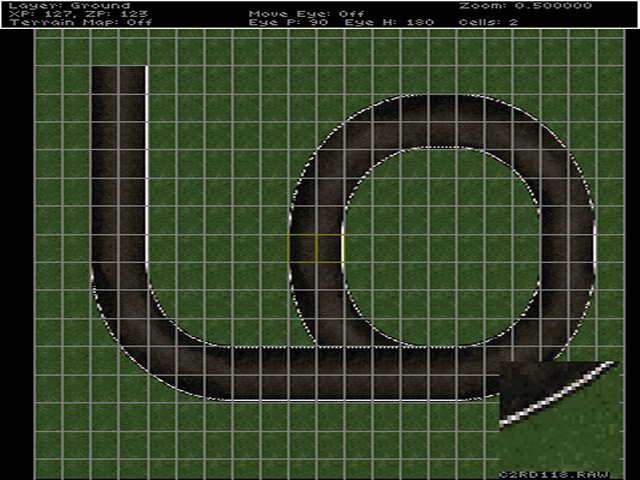
Now move the cursor to the left of the oval, taking care to keep it in line with the base of the existing oval (so we can join them up later), then press F10 to paste the area at the new location. Don't worry if you paste it incorrectly, you can clean up any mistakes later.
Build straights. Now set the cursor width to 2 and height to 1 using the F7 and F8 keys. Then go to the middle of the left edge of the oval and copy the straight section (just like you did with the corner). Paste this repeatedly coming up from the corner you just pasted. Now do the same thing for the other straight along the bottom. Set Width to 1 and Height to 2 and copy the straight segment from the bottom or top of the oval, then paste repeatedly to join the oval to our new corner.
Complete the circuit. Repeat the copy/paste process with width/height set to 5x5 for the top-left corner so that it is connected to the vertical straight section. Then again with the top-right corner. You can now set width/height to 1x2 and then to 2x1 to quickly copy/paste straight segments to join up the corners.
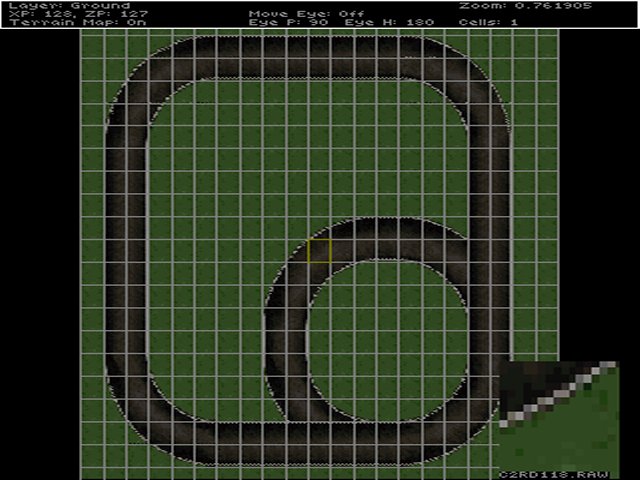
Erase unwanted texturing. The inner part of the original oval is no longer needed, so we should turn it back into grass. The easiest way to do this is to set width/height to 3x3, then select our base grass texture (CR4GR00.RAW). You can now just position the cursor over the unwanted road areas and press the space bar.
Save your work! Press Esc and you will be prompted to save your work.

Press Y for yes. The track will be saved using the same name you gave it when you first set it up.
Setting texture properties. Each texture has its own settings for type and grip depth. These settings change the way the trucks handle, skidding noises, dirt kick-up, etc. Therefore, they need to be set properly. Back in the Texture Map Editor, highlight a texture with the cursor and press the Y key. A box will pop up that lists the available texture types.
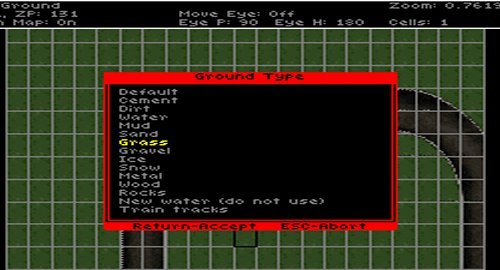
For our first (grass) texture (CR4GRS00.RAW), select grass and press enter. You will be prompted for a grip depth. Type 3 and press enter.
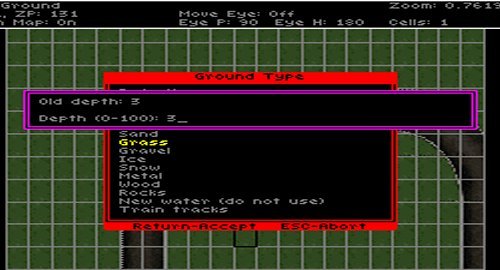
You will return to the track area. Move to the next texture and set its type. Repeat for the other textures. For textures that are more than 50% grassy, set the type to "Grass" and "Grip depth" to 2. For all the others, which will be 50% or more pavement, set them to "Cement" and "Grip depth" to 1.
Save your work when you're done.
| < < prev < < | Tracked2 Menu | > > next > > |